PSVR2 Expert Setup & Room Calibration
Optimizing the VR Experience
Setup is more than just plugging in a USB-C cable. To get the clearest image and prevent motion sickness, you must calibrate the eye-tracking and lens distance specifically to your face. On the **PS5 Pro**, these calibrations are even more critical, as PSSR AI-upscaling uses eye-tracking data to prioritize fidelity exactly where you are looking.
🥽 VR Immersion Essentials
VR hardware is sensitive to environment and maintenance. Ensure you have these bases covered:
- Optics: Protect your Fresnel lenses with Anti-Fog Optical Microfiber.
- Hygiene: Use Silicone Face Cover Masks to prevent sweat from damaging the internal sensors.
- Cable Safety: Use Ceiling Cable Management Pulleys to prevent tripping during room-scale play.
- Tracking: Ensure a consistent IR light source with a VR IR Illuminator for playing in dark rooms.
Clarity Warning: Oils from your skin can permanently smudge the PSVR2’s Fresnel lenses. Never use harsh chemicals. For the safest way to maintain your optics, refer to our Precision Maintenance guide for recommended microfiber solutions.
Step-by-Step Instructions
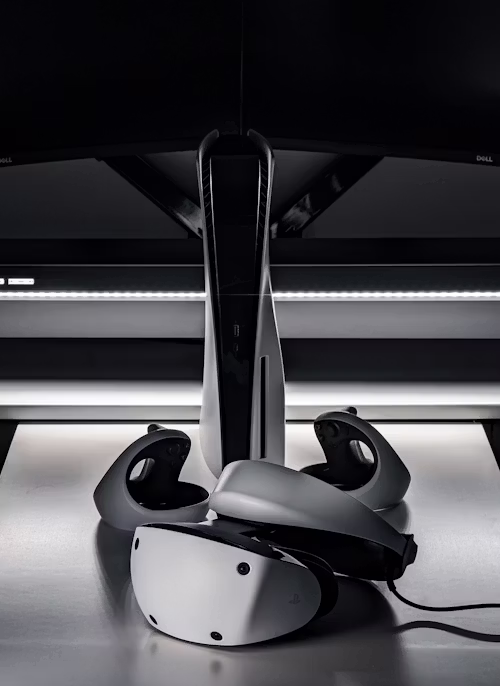
- Physical Connection: Plug the PSVR2 cable into the front USB-C port. Ensure there are no sharp bends.
- Lens Adjustment: Use the dial on the top left of the headset to adjust the IPD until the on-screen calibration image is centered.
- Eye Tracking: Navigate to Settings > Accessories > PSVR2 > Eye Tracking. This is vital for foveated rendering, which keeps your games running at high framerates.
- Audio Immersion: For the best 2026 spatial audio, use a headset that supports PlayStation Link. See our Best PS5 Headsets for VR-compatible options.
- Room Scanning: Ensure your room is well-lit so the cameras can map your furniture accurately for a safe "Play Area."
⚠️ Tech Tip: The PSVR2 cable is non-replaceable. We strongly recommend a USB-C 10Gbps Extension Breakaway Cable to save your PS5 port if you move too far during play.
Want to experience 3D audio without clunky earbuds?
The included earbuds often lack the low-end punch needed for immersive VR horror and racing games.
View VR-Ready Headsets & Prices